Are you facing the intimidating task of painting newly plastered walls in your home? This guide is here to alleviate your concerns and offer you valuable advice and techniques to achieve a polished and professional result. With detailed instructions and expert guidance, you can confidently transform your walls into masterpieces.
What Is Plastering?
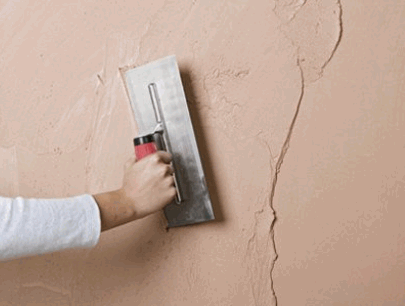
Plastering is a technique used to create a smooth and even surface on walls and ceilings. It involves applying a mixture of plaster and water to the surface, which is then left to dry and harden. This process helps to hide imperfections in the underlying surface and provides a solid base for painting or wallpapering. Plastering is an important step in the process of renovating or decorating a room, as it ensures a professional and finished look. It requires skill and precision to achieve the desired results.
Why Is It Important To Paint New Plastered Walls?
Painting newly plastered walls is important for several reasons.
Firstly, it helps to protect the walls from moisture and damage. By applying a coat of paint, you create a barrier that prevents water from seeping into the plaster and causing it to deteriorate.
Secondly, painting newly plastered walls enhances their appearance. It gives them a smooth, finished look and allows you to choose the color or design that suits your style.
Lastly, painting helps to seal the surface of the plaster, minimizing the risk of dust or particles becoming airborne. This contributes to a healthier indoor environment.
So, to preserve the integrity, improve aesthetics, and maintain a clean space, painting newly plastered walls is essential.
What Are The Steps To Prepare New Plastered Walls For Painting?
When it comes to painting newly plastered walls, it is important to prepare them properly in order to achieve a smooth and long-lasting finish. In this section, we will explain the necessary steps to prepare your walls before painting. Each step, from cleaning the walls to priming them, is essential in ensuring a flawless paint job. So, let's delve into the details and learn how to properly prepare newly plastered walls for painting.
1. Clean The Walls
Cleaning the walls is an essential step when preparing newly plastered walls for painting. Here are the steps to clean the walls effectively:
- Remove any loose dirt or dust by gently wiping the walls with a dry cloth or a soft brush.
- Prepare a mild cleaning solution by mixing warm water and a small amount of gentle detergent.
- Dip a sponge or a soft cloth into the cleaning solution and wring out any excess liquid.
- Gently wipe the walls using circular motions, starting from the top and working your way down.
- Rinse the sponge or cloth frequently in clean water to remove any dirt or soap residue.
- Once the walls are clean, allow them to air dry completely before proceeding with the next steps.
By following these steps, you can ensure that your new plastered walls are clean and ready for painting, resulting in a smooth and professional finish.
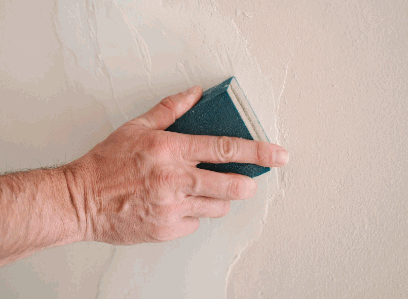
2. Sand Down Any Rough Areas
- Inspect the freshly plastered walls for any rough areas or imperfections.
- Use a fine-grit sandpaper or sanding block to gently sand down the rough areas until they feel smooth to the touch.
- Be careful not to overspend or apply excessive pressure, as it can damage the plaster.
- Wipe away any dust or debris using a clean cloth or vacuum.
- Repeat the sanding and cleaning process as needed until the entire surface is smooth and free of rough patches.
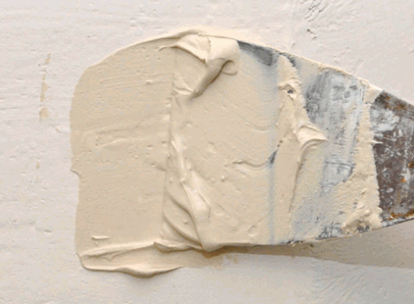
3. Fill In Any Holes Or Cracks
When preparing newly plastered walls for painting, it is necessary to fill in any holes or cracks to achieve a smooth and perfect finish. Follow these steps:
- Thoroughly clean the walls to remove any dust or debris.
- Inspect the walls for any holes or cracks.
- Use a putty knife to apply a patching compound or filler to fill in the holes and cracks.
- Smooth out the filler with the putty knife, making sure it is level with the wall surface.
- Allow the filler to dry completely.
- Sand down the filled areas to create a seamless surface.
- Wipe away any dust left from sanding.
By following these steps, you can ensure that your new plastered walls are ready for a smooth and professional-looking paint job.
4. Prime The Walls
Priming the walls is an important step in preparing newly plastered walls for painting. It helps to create a smooth and even surface, improves paint adhesion, and enhances the overall durability of the paint job.
Here are the steps involved in priming the walls:
- Clean the walls thoroughly to remove any dust or debris.
- Apply a coat of primer using a paintbrush or roller, ensuring even coverage.
- Allow the primer to dry completely before applying the paint.
Priming the walls before painting is particularly important if the plaster is porous or has a high alkaline content. It helps to seal the surface, preventing the paint from being absorbed unevenly and resulting in a more professional and long-lasting finish.
What Tools And Materials Are Needed For Painting New Plastered Walls?
Before you start painting your newly plastered walls, it's important to gather all the necessary tools and materials. In this section, we'll go over each item you will need to ensure a successful paint job. From paint brushes and rollers to drop cloths and painter's tape, we'll cover the essentials that will make your painting process smoother and more efficient. So, let's get ready to paint those freshly plastered walls!
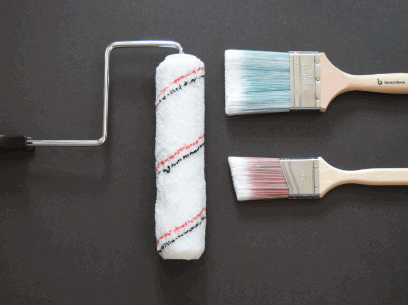
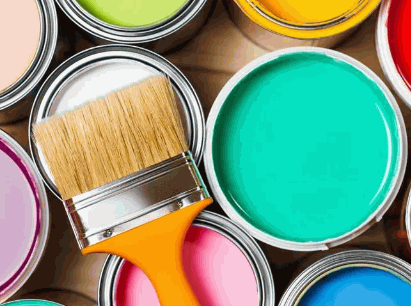
1. Paint Brushes And Rollers
When painting new plastered walls, using the right paint brushes and rollers is crucial for achieving a smooth and professional finish. Here are some steps to consider:
- Choose the appropriate paint brushes and rollers based on the size and texture of the walls.
- Use a high-quality paintbrush that is suitable for the type of paint being used.
- Select a roller that is appropriate for the wall surface, such as a foam roller for smooth walls or a textured roller for textured surfaces.
- Before painting, make sure to clean and prepare the walls properly, ensuring they are free from dust, dirt, and any imperfections.
- Apply the paint evenly using the paintbrush and then use the roller to cover larger areas quickly and efficiently.
- For a professional finish, apply multiple thin coats of paint rather than one thick coat.
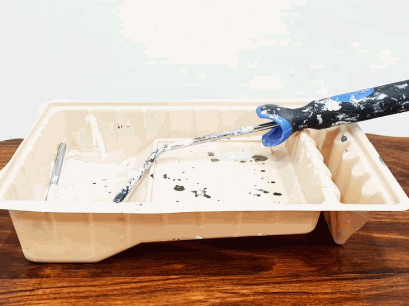
2. Paint Tray
A paint tray is an essential tool when painting newly plastered walls. Here are the steps to effectively use a paint tray:
- Pour the desired amount of paint into the tray.
- Dip the brush or roller into the paint, ensuring even coverage.
- Tap off any excess paint on the edge of the tray to prevent dripping.
- Start painting from the top of the wall, working your way down.
- Replenish the paint in the tray as needed.
- Clean the paint tray thoroughly after each use to avoid dried paint build-up.
Using a paint tray helps to distribute paint efficiently and allows for easy access during the painting process.
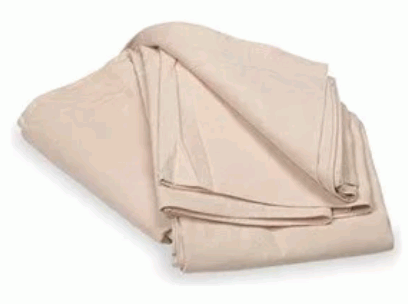
3. Drop Cloths
Drop cloths are essential when painting newly plastered walls as they protect floors and furniture from paint splatters and drips. Here are the steps to use drop cloths effectively:
- Choose the appropriate type of drop cloth, such as canvas or plastic, based on your needs and budget.
- Prior to painting, lay the drop cloth over the floor, ensuring it covers a wide area to catch any stray paint.
- Secure the edges of the drop cloth to the baseboards or walls using tape to keep it in place.
- If necessary, overlap multiple drop cloths to create a larger protective surface.
- While painting, regularly inspects the drop cloth for any paint spills or drips and promptly clean them up.
By using drop cloths, you can avoid the hassle of cleaning up paint stains and achieve a neat and professional painting job.
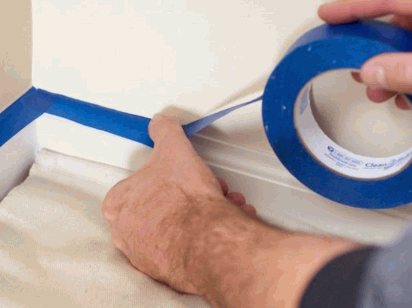
4. Painter's Tape
Painter's tape is an essential tool for painting newly plastered walls. It is used to protect areas that you do not want to be painted, such as trim, windows, and door frames. By applying painter's tape along the edges, you can create clean and precise lines. It helps prevent paint from bleeding onto adjacent surfaces, resulting in a professional finish.
When selecting painter's tape, choose a high-quality brand that is easy to apply and remove without leaving residue or damaging the surface.
Overall, painter's tape is a valuable tool for achieving a tidy and polished appearance when painting newly plastered walls.
5. Paint
When it comes to painting newly plastered walls, it is important to follow a step-by-step process and use the correct tools and materials to achieve a professional finish.
- Thoroughly clean the walls to remove any dust or debris.
- Sand down any rough areas to create a smooth surface.
- Fill in any holes or cracks with filler and allow it to dry before continuing.
- Apply a suitable primer to the walls to ensure better adhesion and a more even finish.
- Use paint brushes and rollers to apply the paint evenly.
What Is The Best Technique For Painting New Plastered Walls?
When it comes to painting newly plastered walls, there are several techniques that can be utilized. In this section, we will discuss the most effective technique for obtaining a smooth and professional finish on your freshly plastered walls. We will go over the three primary steps involved: cutting in, applying the paint with a roller, and applying a second coat if needed. By the end, you will have a greater understanding of how to paint newly plastered walls and achieve the desired outcomes.
1. Start With Cutting In
Starting with cutting in is an important step when painting newly plastered walls. It involves creating a precise line along the edges of the wall, where it meets the ceiling, corners, and trim. Here are the steps to follow:
- Prepare the paint by stirring it thoroughly.
- Use a small brush to carefully paint along the edges, creating a straight line.
- Start from the top and work your way down, moving in sections.
- Take your time and be patient to achieve a clean and professional look.
- Once the cutting in is done, you can use a roller to fill in the larger areas of the wall.
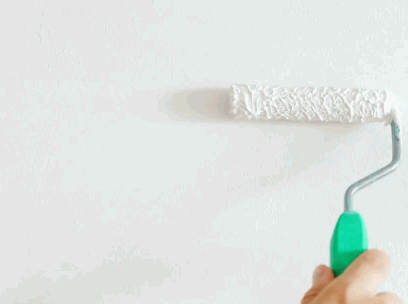
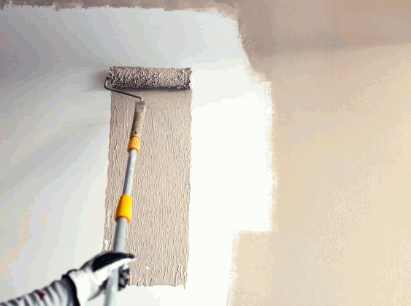
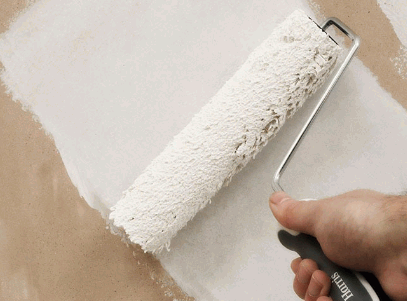
2. Roll The Paint On
Rolling the paint on newly plastered walls requires careful preparation and technique to achieve a smooth and even finish. Here are the steps to follow:
- Cover the floor and furniture with dust sheets to protect them from paint splatters.
- Start by cutting in the edges of the walls using a paintbrush to create a clean line between the wall and the ceiling, corners, and trim.
- Pour the paint into a tray and load the roller. Begin rolling the paint onto the walls in a "W" or "M" pattern, working in small sections.
- Apply the paint evenly and avoid applying too much pressure, as this can result in streaks or drips.
- Overlap each section slightly to ensure consistent coverage.
- Allow the first coat to dry completely, then apply a second coat if necessary for a more vibrant and even finish.
By following these steps, you can achieve a professional-looking result when rolling the paint on newly plastered walls.
3. Use A Second Coat If Necessary
To achieve a professional finish when painting newly plastered walls, it may be necessary to apply a second coat of paint. Here are the steps to follow:
- Once the first coat of paint has dried completely, check the walls for any areas that may need additional coverage.
- If there are any uneven patches, imperfections, or areas where the first coat seems thin, apply a second coat of paint.
- Use a brush or roller to carefully apply the second coat, ensuring even coverage and a smooth application.
- Allow the second coat to dry completely before determining if any further touch-ups or additional coats are required.
- Repeat the process of applying additional coats if necessary until you achieve the desired finish and coverage.
Remember, applying a second coat of paint can enhance the overall appearance and durability of newly plastered walls.
What Are Some Tips For Achieving A Professional Finish?
As any homeowner knows, painting newly plastered walls can be a challenging task. However, by employing suitable techniques and tools, you can attain a professional result that ensures your walls appear sleek and impeccable. In this section, we will explore some crucial advice for accomplishing a refined and superior paint job. By selecting the appropriate paint, dedicating sufficient time, and utilizing proper lighting, these tips will assist you in achieving a flawless finish for your recently plastered walls.
1. Use High-Quality Paint
Using high-quality paint is essential for achieving a professional finish when painting new plastered walls. Here are some reasons why:
- Durability: High-quality paint is more resistant to wear and tear, ensuring that your walls will look fresh for a longer time.
- Color Retention: It maintains its color over time, preventing fading or discoloration.
- Smooth Application: High-quality paint goes on smoothly, resulting in an even and flawless finish.
- Coverage: It provides better coverage, requiring fewer coats and less paint to achieve the desired look.
- Longevity: With superior ingredients, high-quality paint is less likely to crack, peel, or blister, ensuring long-lasting results.
Delve into: How To Repair Peeling Paint On Plaster Walls
2. Use Proper Lighting
Using proper lighting is crucial when painting newly plastered walls to ensure a professional finish. Here are some steps to follow:
- Assess the natural lighting in the room to determine if additional artificial lighting is needed.
- Position lighting sources strategically to minimize shadows and ensure even coverage.
- Consider using adjustable lighting fixtures or portable task lights to illuminate specific areas.
- Use bright, white light bulbs to accurately see the wall's texture and ensure proper color application.
- Avoid relying solely on overhead lighting, as it may cast shadows and make it difficult to detect imperfections.
3. Take Your Time
Taking your time is crucial when painting newly plastered walls to ensure a professional finish. Here are some steps to follow:
- Prepare the walls by cleaning them thoroughly.
- Sand down any rough areas to create a smooth surface.
- Fill in any holes or cracks with a suitable filler.
- Prime the walls using a primer suitable for plastered surfaces.
- Choose the right tools and materials including paint brushes, rollers, trays, drop cloths, painter's tape, and high-quality paint.
- Start by cutting in around edges and corners with a brush.
- Roll the paint on the walls using a roller, working in small sections.
- Apply a second coat if necessary for a more even and opaque finish.
- Use proper lighting to identify any missed spots or uneven coverage.
- Take your time during each step to ensure precision and attention to detail.
4. Use A Primer
Using a primer is crucial when painting newly plastered walls. Here are the steps to follow:
- Clean the walls: Remove any dust, dirt, or debris.
- Sand down any rough areas: Smooth out any uneven surfaces.
- Fill in any holes or cracks: Use a filler to repair any imperfections.
- Prime the walls: Apply a coat of primer to create a smooth surface for paint.
By using a primer, you will ensure better paint adhesion, prevent stains or discoloration, and achieve a more professional finish on your newly plastered walls.
5. Use A Good Quality Paintbrush
Using a good quality paintbrush is essential when painting newly plastered walls to achieve a professional finish. Here are some steps to consider when using a good-quality paintbrush:
- Choose the right brush size and type for the job.
- Prepare the paintbrush by removing any loose bristles.
- Dip the brush into the paint, ensuring the bristles are evenly coated.
- Start painting by applying even strokes in one direction.
- Avoid overloading the brush with paint to prevent drips and uneven application.
- Clean the brush thoroughly after use to maintain its quality and prolong its lifespan.
Using a good quality paintbrush will ensure smoother application, better coverage, and a more professional-looking finish on your newly plastered walls.