Are you tired of constantly replacing your kitchen floor due to wear and tear? Look no further, as this article will guide you on how to install a durable and long-lasting resin kitchen floor. Say goodbye to the hassle and expense of frequent floor repairs and hello to a beautiful, low-maintenance kitchen.
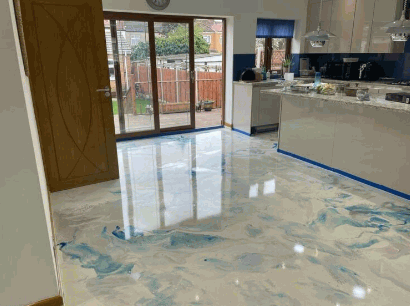
A resin kitchen floor is a durable and seamless flooring option made of a mixture of resin and a hardening agent. It creates a smooth, non-porous surface that's easy to clean and maintain. Resin floors are chemical and stain-resistant, making them ideal for kitchens. They come in various colors and finishes, adding a modern and stylish look to the kitchen space. This type of flooring is also known for its longevity and ability to withstand heavy foot traffic.

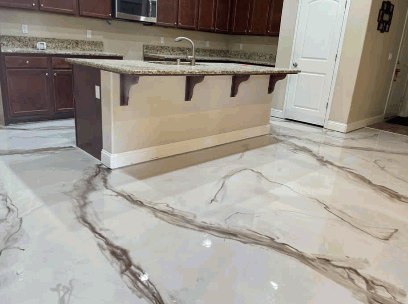
Resin flooring in the kitchen offers durability, a seamless finish, and a variety of design options, making it a popular choice. It is resistant to stains, easy to clean, and provides a smooth surface, ideal for a busy kitchen environment. Additionally, the resin is available in different textures and colors, allowing homeowners to achieve a customized look that complements their kitchen decor.
When it comes to choosing a new kitchen floor, resin flooring has become a popular choice due to its durability, versatility, and easy maintenance. But did you know that there are different types of resin floors available? In this section, we will discuss the various types of resin kitchen floors and their unique characteristics. From the popular epoxy resin flooring to the lesser-known methyl methacrylate (MMA) resin flooring, we will explore the benefits and considerations of each type. So, let's dive in and discover which type of resin kitchen floor is best for your home.
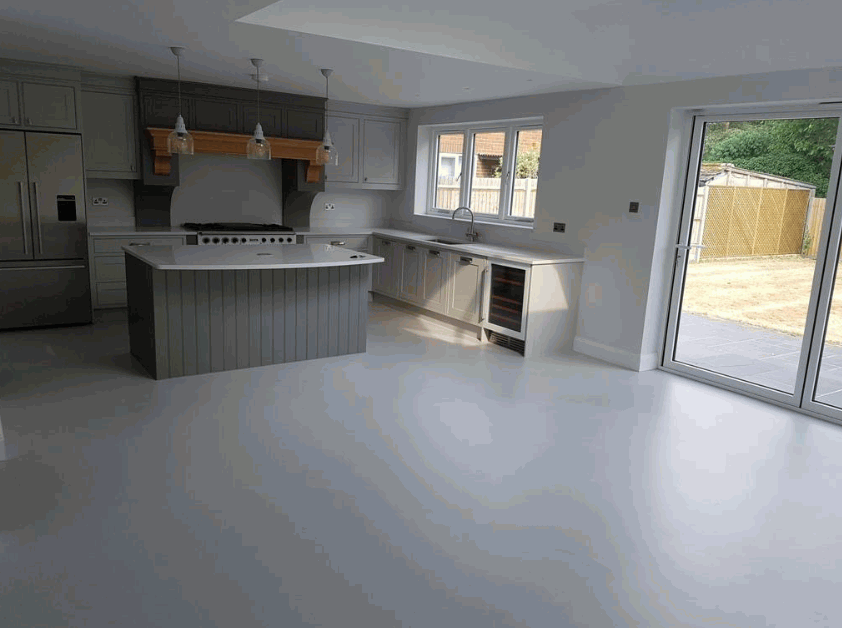
Polyurethane resin flooring is a durable and versatile option for kitchen floors. It offers excellent resistance to chemicals, abrasion, and impacts, making it suitable for high-traffic areas. This type of flooring provides a seamless and smooth surface, preventing dirt and bacteria accumulation. Its flexibility allows it to withstand temperature changes and substrate movements. When considering polyurethane resin flooring, prioritize its easy maintenance and long-term performance.
Prepare the Subfloor:
Ensure it's clean, dry, and free from any debris or contaminants.
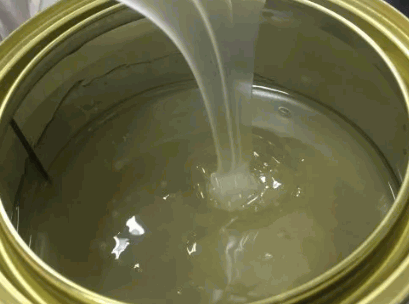
Mix the Components:
Combine the resin and hardener according to manufacturer instructions.
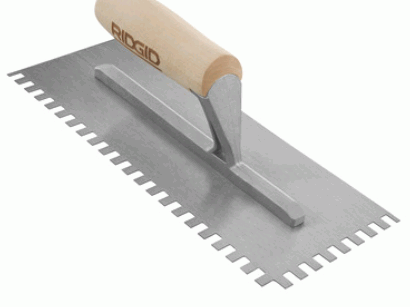
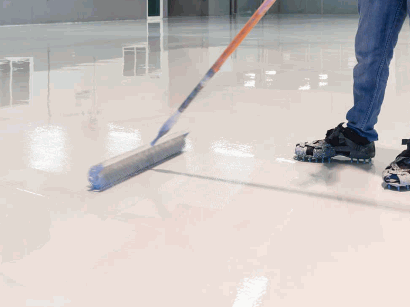
Apply the MMA Resin:
Spread the mixture using a notched trowel to achieve a consistent thickness.
Curing Time:
MMA resin cures rapidly, allowing for quick installation and minimal downtime.
Finish:
Once cured, the floor is ready for immediate use, providing a durable and seamless surface.
Before diving into the installation process of a resin kitchen floor, it is crucial to properly prepare the existing floor for the new surface. This section will cover the necessary steps to take before installing the resin floor to ensure a successful and long-lasting outcome. We will discuss the importance of cleaning and clearing the kitchen floor, repairing any damages or imperfections, and allowing sufficient drying time for the floor to be ready for the resin installation.
Remove all furniture and appliances from the kitchen floor.
Sweep the floor to remove any loose dirt and debris.
Use a mild cleaning solution to clean the entire floor surface thoroughly.
Allow the floor to dry completely before proceeding with the resin flooring installation.
Take a look: How To Clean Epoxy Flooring
Assess the extent of damage or imperfections on the resin kitchen floor.
Identify the type of repair needed, such as filling cracks, smoothing out bumps, or addressing discolored areas.
Prepare the necessary materials for repair, including resin patching compound, sandpaper, and protective gear.
Clean the damaged area thoroughly and ensure it is completely dry before commencing repairs.
Apply the resin patching compound according to the manufacturer's instructions, ensuring a smooth and seamless finish.
Allow the repaired area to cure properly before resuming regular use of the kitchen floor.
After applying the resin mixture, allow proper drying time for at least 24-48 hours before walking on the floor. Avoid moving heavy furniture or appliances onto the newly resin-coated floor until it has fully cured. Ensure adequate ventilation during the drying process to facilitate proper curing and eliminate any residual fumes.
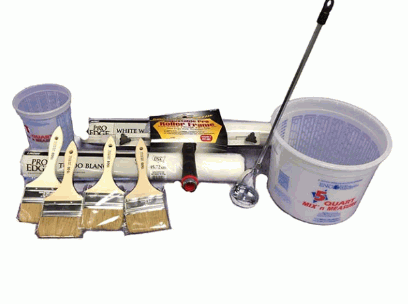
Before you can start installing a resin kitchen floor, it is important to gather all the necessary tools and materials. In this section, we will discuss the five essential items you will need for a successful installation. These include a resin flooring kit, a notched trowel, a spike roller, a mixing paddle, and protective gear. Each of these items plays a crucial role in the installation process and will ensure that your new resin floor is installed correctly and safely.
Choose a high-quality resin flooring kit suitable for your kitchen size and requirements. Ensure the kit includes resin components, mixing tools, and detailed instructions. Consider the coverage area and thickness of the resin layer while selecting the kit. Verify if the kit contains any additional protective coatings or sealants for enhanced durability.
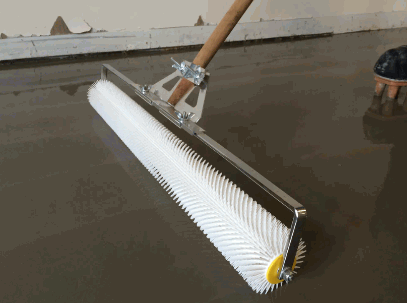
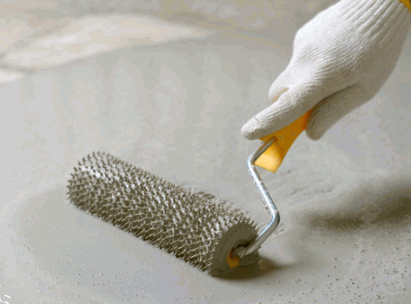
Rolling: After applying the resin mixture, use the spike roller to effectively remove air bubbles.
Wear appropriate clothing to cover the body, along with closed-toe shoes for foot protection. Use safety goggles to shield the eyes from potential splashes or spills of the resin mixture. Employ chemical-resistant gloves to safeguard the hands from direct contact with the resin components. Utilize a respirator or mask to prevent inhalation of harmful fumes during the installation process.

Are you looking to upgrade your kitchen floor with a durable and modern material? Look no further than resin! In this section, we will guide you through the step-by-step process of installing a resin kitchen floor. From mixing the resin components to using a spike roller to remove air bubbles, we will cover it all. Follow these simple instructions to achieve a beautiful and long-lasting resin kitchen floor in your home.
Gather the resin components as per the manufacturer's instructions.
Measure the precise amounts of resin and hardener using a measuring container.
Pour the hardener into the resin container.
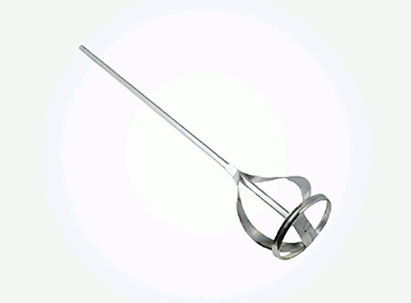
Thoroughly mix the components using a paddle until the mixture is uniform.
Ensure the mixture is free of any lumps or streaks.
Prepare the Mixture:
Apply the Resin:
Spread Evenly:
Smooth Out:
Allow Drying:
Prepare the Resin:
Application:
Smoothing:
Remove Air Bubbles:
Drying:
Roller preparation:
Ensure the spike roller is clean and free of any debris or dirt.
Application:
Once the resin mixture is applied, promptly roll the spike roller over the surface, exerting even pressure to eliminate air bubbles.
Repeat:
If necessary, go over the area multiple times until all air bubbles are removed.
Allow drying:
After using the spike roller, allow the resin to dry completely as per the manufacturer's instructions.
After applying the resin mixture on the kitchen floor,
Once you have successfully installed a resin kitchen floor, it is important to know how to properly maintain it to ensure its longevity and beauty. In this section, we will discuss the key steps to keeping your resin kitchen floor in top condition. From simple cleaning techniques to avoiding harsh chemicals, we will cover all the necessary maintenance tips to keep your floor looking brand new. So let’s get started on learning how to maintain a resin kitchen floor!
Regularly sweep the floor to remove dirt, dust, and debris.
Mop the floor using a mild cleaning solution and water to maintain cleanliness.
Avoid harsh chemicals that could damage the resin floor.
Immediately repair any damages to prevent them from worsening.
Avoid using harsh chemical cleaners on the resin kitchen floor to prevent damage and maintain its longevity. Instead, opt for mild cleaning solutions such as a mixture of warm water and gentle dish soap to effectively clean the floor. Regularly sweep and mop the floor to remove dirt and grime without causing any harm to the resin surface. Immediately attend to any damages or spills to avoid the need for harsh cleaning methods in the future.
Regularly inspect the floor for any damages, such as cracks, chips, or discoloration. Address any damages immediately to prevent further deterioration. Use appropriate repair materials and techniques based on the type of damage. Ensure the repaired area blends seamlessly with the rest of the floor.


61a, Walton St, Walton On The Hill, Tadworth,
Surrey, KT20 7RZ