Can You Use Plaster In A Bathroom

Published by
14 November 2023
Follow me on

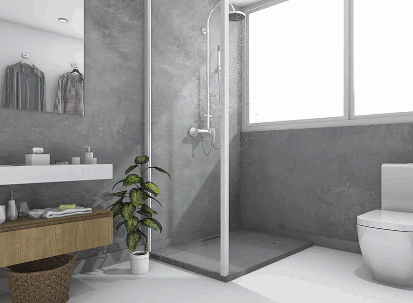
Are you tired of dealing with mold and mildew in your bathroom? Are you looking for a durable and waterproof solution to decorate your bathroom walls? Look no further, as this article will explore the potential of using plaster in a bathroom. Discover the benefits and challenges of using this material and decide if it's the right choice for you.

Is Plaster Suitable for Bathrooms?

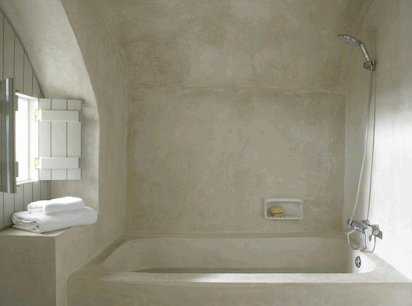
Plaster is generally not recommended for use in bathrooms due to its porous nature, which makes it susceptible to moisture damage and mold growth. Instead, materials such as tile or moisture-resistant paint are recommended for use in bathroom settings. These options act as a protective barrier against water and humidity.

Find out more: How To Paint New Plastered Walls

What Are The Different Types Of Plaster?

When it comes to home renovations, the bathroom is often a top priority. But before diving into a bathroom project, it's important to understand the materials that will be used. One common question is whether plaster can be used in a bathroom. The answer is yes, but not all types of plaster are suitable for this environment. In this section, we will discuss the different types of plaster and their unique properties, including gypsum plaster, lime plaster, and cement plaster. By the end, you'll have a better understanding of which type of plaster is best for your bathroom project.

1. Gypsum Plaster

Gypsum plaster is a popular choice for bathroom walls due to its moisture-resistant properties and ease of application. Here are the steps for properly applying gypsum plaster in a bathroom:

  1. Prepare the surface by removing any old paint or wallpaper and ensuring it is clean and dry.
  2. Mix the gypsum plaster according to the manufacturer's instructions.
  3. Apply the first coat of gypsum plaster using a trowel, ensuring even coverage on the entire surface.
  4. Smooth out the surface using a plaster float or trowel to create a level and even finish.
  5. Apply a second coat of gypsum plaster, if necessary, to achieve the desired thickness and smoothness.
  6. Allow the gypsum plaster to dry completely, then sand any rough areas and finish with a primer and paint.

By following these steps, you can achieve a durable and attractive gypsum plaster finish in your bathroom.

2. Lime Plaster

Lime plaster is a traditional material that offers several benefits when used in bathrooms. To properly apply lime plaster, follow these steps:

  1. Prepare the surface by cleaning and removing any loose material.
  2. Mix the lime plaster with water according to the manufacturer's instructions.
  3. Apply the first coat of lime plaster evenly onto the surface using a trowel.
  4. Smooth out the surface with a plastering float to achieve a uniform finish.
  5. Apply a second coat of lime plaster if necessary, ensuring it is applied evenly.
  6. Allow the lime plaster to dry completely before sanding and finishing the surface.

The use of lime plaster in bathrooms has advantages, such as its breathability, mold resistance, and ability to absorb moisture. However, it may require regular maintenance and has limited design options compared to alternatives like tiles or acrylic panels.

3. Cement Plaster

Cement plaster is a commonly used type of plaster for bathrooms due to its durability and resistance to moisture. When applying cement plaster in a bathroom, follow these steps:

  1. Prepare the surface by cleaning and removing any loose debris.
  2. Mix the cement plaster according to the manufacturer's instructions.
  3. Apply the first coat of cement plaster, ensuring even coverage and a smooth surface.
  4. Smooth out the surface using a trowel or float.
  5. Apply the second coat of cement plaster, building up thickness if needed.
  6. Sand and finish the cement plaster once it has dried completely.

While cement plaster has its benefits, such as affordability and versatility, it also has its limitations. Consider alternatives like tile, vinyl wallpaper, acrylic panels, or fiberglass panels for bathroom walls and ceilings. Each option has its advantages and can provide a stylish and functional alternative to cement plaster.

What Are The Pros And Cons Of Using Plaster In Bathrooms?

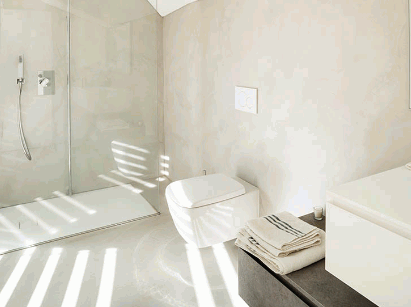
When it comes to bathroom renovations, one material that often comes to mind is plaster. But is it a suitable choice for this high-moisture environment? In this section, we will discuss the pros and cons of using plaster in bathrooms. From its durability and versatility to potential issues with moisture and mold, we'll cover all the important factors to consider when deciding whether or not to use plaster in your bathroom.

Pros:

Plaster in bathrooms offers several advantages: affordability, ease of use, and versatility. Plaster is a cost-effective and readily available option, making it a budget-friendly choice. It is also easy to work with, allowing for smooth application and flexibility in design. However, there are drawbacks to consider: vulnerability to moisture damage, requiring regular maintenance, and limited design options.

To properly apply plaster in a bathroom, it is important to:

  1. Prepare the surface
  2. Mix the plaster
  3. Apply the first coat
  4. Smooth the surface
  5. Apply the second coat
  6. Finish with sanding

There are also alternative options to consider such as:

  • Tile
  • Vinyl wallpaper
  • Acrylic panels
  • Fiberglass panels

- Affordable

Plaster is a cost-effective option for bathroom walls and ceilings due to its low cost and easy availability. It is also user-friendly, making it a popular choice among DIY enthusiasts. Plaster is versatile and can be applied to various surfaces, providing a smooth and seamless finish. However, there are some drawbacks to using plaster in bathrooms. It is prone to moisture damage and requires regular maintenance to prevent issues like peeling or cracking. Additionally, plaster offers limited design options compared to alternatives like tiles, vinyl wallpaper, acrylic panels, or fiberglass panels. Keep these factors in mind when deciding if plaster is the right choice for your bathroom.

- Easy to Work With

Working with plaster in a bathroom can be convenient due to its easy application process and workability.

  • Prepare the surface by cleaning it thoroughly and removing any loose paint or debris.
  • Mix the plaster according to the manufacturer's instructions, ensuring a smooth and lump-free consistency.
  • Apply the first coat of plaster evenly using a trowel, starting from the bottom and working your way up.
  • Smooth out the surface with a plastering float, removing any excess plaster and creating a level finish.
  • Apply the second coat of plaster, following the same technique as before, to ensure a strong and durable finish.
  • Sand and finish the plaster after it has dried completely to achieve a smooth and polished surface.

Alternatively, if you prefer alternatives to plaster in your bathroom, consider options like:

  • Using tiles for an easy-to-work-with, waterproof, and customizable solution.
  • Vinyl wallpaper for a cost-effective and easy-to-clean option.
  • Acrylic panels for a sleek and modern look.
  • Fiberglass panels for a lightweight and durable alternative.

- Versatile

Plaster is a versatile material that can be used in various ways in bathrooms. It is affordable, easy to work with, and offers a range of design options. However, there are some downsides to consider. While plaster is versatile, it is prone to moisture damage and requires regular maintenance. Additionally, it has limited design options compared to other materials.

To properly apply plaster in a bathroom, you need to:

  1. Prepare the surface
  2. Mix the plaster
  3. Apply multiple coats
  4. Finish the surface

Alternatives to plaster in bathrooms include:

  • Tiles
  • Vinyl wallpaper
  • Acrylic panels
  • Fiberglass panels

Overall, while plaster offers versatility, it is important to weigh the pros and cons before choosing it for your bathroom.

Cons:

Using plaster in bathrooms comes with some drawbacks that should be considered before making a decision. Here are the negative aspects of using plaster in bathrooms:

  1. Prone to moisture damage: Plaster is not as resistant to moisture as other materials, which can lead to peeling, cracking, and mold growth.
  2. Requires regular maintenance: Plaster needs to be properly sealed and regularly maintained to prevent moisture infiltration and damage.
  3. Limited design options: Unlike other materials, plaster has limited design options and may not offer the versatility and aesthetic appeal that some homeowners desire.

Considering these cons, it's important to explore alternative options for bathroom walls such as tiles, vinyl wallpaper, acrylic panels, or fiberglass panels. These alternatives offer better resistance to moisture and provide more design flexibility.

- Prone to Moisture Damage

Plaster in bathrooms is susceptible to moisture damage due to its porous nature. To prevent this issue, follow these steps when applying plaster in a bathroom:

  1. Prepare the surface by cleaning and removing any loose debris.
  2. Mix the plaster according to the manufacturer's instructions.
  3. Apply the first coat of plaster using a trowel or plastering tool.
  4. Use a wet sponge or trowel to smooth out the surface and create an even finish.
  5. Ensure the second coat of plaster covers the entire surface.
  6. After the plaster has dried, sand and finish it to achieve a smooth and polished look.

Given the moisture-prone nature of plaster, it is important to consider alternative options such as tile, vinyl wallpaper, acrylic panels, or fiberglass panels for bathroom walls.

- Requires Regular Maintenance

Regular maintenance is necessary for the upkeep of plaster in bathrooms. Here are the essential steps for proper plaster maintenance:

  1. Regularly inspect the plaster for any cracks or damage.
  2. Promptly repair any cracks or damage to prevent further deterioration.
  3. Keep the plaster clean by regularly dusting or wiping it.
  4. Avoid using abrasive cleaners that may harm the plaster surface.
  5. Apply a fresh coat of paint or sealer periodically to maintain its appearance and protect it from moisture.
  6. Monitor the humidity levels in the bathroom and use a dehumidifier if necessary to prevent excessive moisture buildup.

By following these maintenance steps, you can ensure that your bathroom's plaster remains in good condition and prolongs its lifespan.

- Limited Design Options

Plaster in bathrooms has a smooth and uniform finish that may not provide the desired aesthetic appeal due to its limited design options. However, there are alternatives to consider:

  1. Title: Provides a wide range of design options, from traditional to modern styles.
  2. Vinyl Wallpaper: Offers various patterns and textures, allowing for personalized designs.
  3. Acrylic Panels: Easy to install and clean, with options for different colors and finishes.
  4. Fiberglass Panels: Durable and moisture-resistant, available in different designs.

Consider these alternatives to achieve the desired look and functionality in your bathroom.

How To Properly Apply Plaster In A Bathroom?

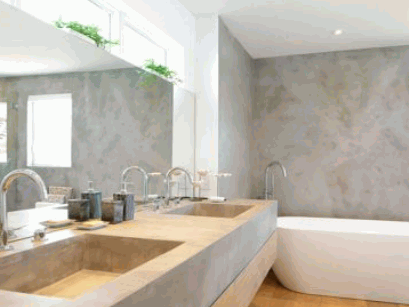
Plastering is a popular and cost-effective way to give your bathroom a fresh new look. But can you use plaster in a bathroom? The answer is yes, but it requires careful preparation and application to ensure a long-lasting and water-resistant finish. In this section, we will discuss the step-by-step process of properly applying plaster in a bathroom. From preparing the surface to sanding and finishing, we'll cover all the necessary techniques to achieve a smooth and durable result.

1. Prepare The Surface

Preparing the surface is a crucial step when applying plaster in a bathroom. Follow these steps:

  1. Clean the surface thoroughly, removing any dirt, grime, or old paint.
  2. Repair any cracks, holes, or imperfections in the wall using a patching compound.
  3. Prime the surface with a suitable primer to ensure proper adhesion of the plaster.
  4. Apply a bonding agent to enhance the bond between the plaster and the surface.
  5. Moisten the surface slightly with water to prevent the plaster from drying too quickly.
  6. Use a trowel to evenly apply the plaster onto the surface, starting from the bottom and working your way up.
  7. Smooth out the plaster using a plastering float or trowel, removing any excess material.

Fact: Properly preparing the surface ensures better adhesion and a smoother finish for the plaster in your bathroom.

2. Mix The Plaster

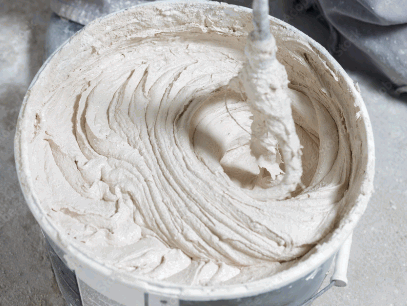
Mixing the plaster for bathroom application involves several steps:

  1. Gather the necessary tools: a mixing bucket, plaster, water, and a mixing paddle.
  2. Measure the plaster and water according to the manufacturer's instructions. Typically, a 2:1 ratio of plaster to water is used.
  3. Pour the plaster into the mixing bucket.
  4. Add the water slowly while stirring continuously to avoid lumps.
  5. 2. Mix the Plaster
  6. Let the mixture sit for a few minutes to allow any air bubbles to rise to the surface.

Remember to follow safety precautions, such as wearing gloves and a mask, while mixing the plaster.

3. Apply The First Coat

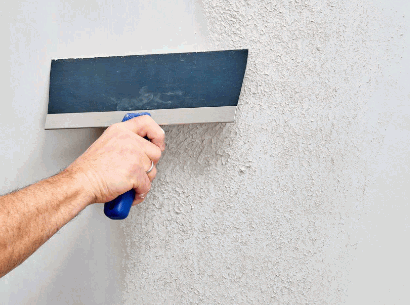
To achieve a smooth and even finish when applying the first coat of plaster in a bathroom, it is important to follow a systematic approach.

  1. Begin by thoroughly cleaning the surface and ensuring it is free from dust and debris.
  2. Next, mix the plaster according to the manufacturer's instructions, ensuring a smooth and lump-free consistency.
  3. Using a trowel, start at the bottom and work your way up as you apply the first coat of plaster to the prepared surface, using even strokes.
  4. Smooth out the surface using a plastering float or trowel, ensuring an even and level finish.
  5. Allow the first coat to dry completely before moving on to the next steps.
  6. Once dry, sand and finish the first coat, removing any imperfections and creating a smooth surface for the subsequent coats.

Fun Fact: The first coat of plaster is crucial for creating a solid foundation and ensuring the longevity of the final plastered surface in a bathroom.

4. Smooth Out The Surface

To achieve a smooth surface when applying plaster in a bathroom, follow these steps:

  1. Prepare the surface by removing any loose material and ensuring it is clean and dry.
  2. Mix the plaster according to the manufacturer's instructions, ensuring a smooth and lump-free consistency.
  3. Apply the first coat of plaster using a trowel, spreading it evenly and smoothing out any uneven areas.
  4. Smooth out the surface further by using a plaster float or wet sponge, removing any excess material and creating a uniform texture.
  5. Allow the first coat to dry completely before applying a second coat, repeating the process of spreading and smoothing.
  6. After the final coat is dry, use sandpaper to lightly sand the surface, removing any imperfections and creating a smooth finish.

Consider these suggestions for a successful plaster application: ensure proper ventilation, wear protective gear, and practice proper clean-up techniques.

5. Apply The Second Coat

To properly apply the second coat of plaster in a bathroom, follow these steps:

  1. Prepare the surface by cleaning it thoroughly and removing any loose debris.
  2. Mix the plaster according to the manufacturer's instructions, ensuring a smooth and lump-free consistency.
  3. Apply the first coat of plaster evenly using a trowel, covering the entire surface.
  4. Smooth out the surface by using a plaster float, removing any excess plaster, and creating a level and even finish.
  5. Allow the first coat to dry completely before applying the second coat.
  6. Apply the second coat of plaster using the same techniques as the first coat, ensuring an even and consistent application.
  7. Smooth out any imperfections or ridges using a plaster float or sandpaper.
  8. Allow the second coat to dry thoroughly before proceeding with further finishing or decoration.

6. Sand And Finish

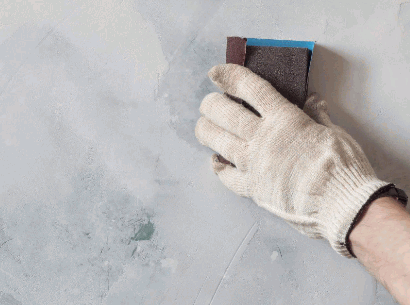
To properly sand and finish plaster in a bathroom, follow these steps:

  1. Prepare the surface by cleaning it thoroughly and removing any loose plaster or debris.
  2. Mix the plaster according to the manufacturer's instructions, ensuring a smooth and consistent texture.
  3. Apply the first coat of plaster evenly using a trowel, filling in any gaps or imperfections.
  4. Smooth out the surface using a damp sponge or a plaster float, ensuring a flat and even finish.
  5. Apply the second coat of plaster, following the same process as before to achieve a thicker and more durable layer.
  6. Sand the surface lightly once the plaster is dry, using fine-grit sandpaper to achieve a smooth and polished result.
  7. Finish the plaster by applying a primer and then sanding and finishing the surface for added protection and aesthetics.

What Are The Alternatives To Plaster In Bathrooms?

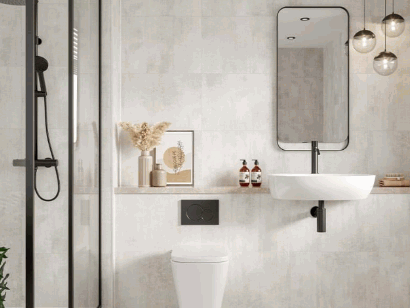
While plaster may be a common choice for bathroom walls, it is not the only option. There are several alternatives that can provide both functionality and style in a bathroom setting. In this section, we will take a closer look at the different materials that can be used in place of plaster, including tile, vinyl wallpaper, acrylic panels, and fiberglass panels. By considering the pros and cons of each option, you can determine the best choice for your bathroom needs.

1. Tile

Tiles are a popular choice for bathroom walls and floors due to their durability and water resistance. Here are the steps to properly install tiles in a bathroom:

  1. Prepare the surface by ensuring it is clean, dry, and free of any debris.
  2. Apply a layer of mortar or adhesive to the surface using a trowel.
  3. Place the tiles firmly onto the adhesive, starting from one corner and working your way across.
  4. Use tile spacers to maintain even gaps between tiles.
  5. Allow the adhesive to dry completely before grouting.
  6. Apply grout between the tiles using a grout float, making sure to fill all the gaps.
  7. Wipe off any excess grout with a damp sponge.
  8. Finally, seal the grout to protect it from moisture and stains.

When choosing tile for your bathroom, consider factors such as size, color, and texture to achieve the desired aesthetic. Good tile options for bathrooms include ceramic, porcelain, and natural stone.

2. Vinyl Wallpaper

Vinyl wallpaper is a popular alternative to plaster in bathrooms due to its durability, moisture resistance, and ease of installation. It offers a wide range of design options, including textured and patterned finishes. By using vinyl wallpaper, you can easily give your bathroom a new look without the hassle of applying plaster.

However, proper surface preparation is crucial before hanging the wallpaper to ensure a smooth and long-lasting result. If you're looking for other alternatives, you may also consider:

  • Tile
  • Acrylic panels
  • Fiberglass panels

For your bathroom walls, each option has its own advantages and can be chosen based on your specific preferences and requirements.

3. Acrylic Panels

Acrylic panels are a popular alternative to plaster in bathrooms due to their durability, versatility, and ease of installation. Here are the steps to properly install acrylic panels in a bathroom:

  1. Measure the dimensions of the bathroom walls to determine the size of the acrylic panels needed.
  2. Clean and prepare the walls by removing any existing wallpaper, paint, or debris.
  3. Apply a coat of adhesive or silicone caulk to the back of the acrylic panels.
  4. Position the panels on the walls, starting from the bottom and working your way up.
  5. Secure the panels in place by pressing them firmly against the walls.
  6. Use a level to ensure that the panels are straight and aligned.
  7. Trim any excess panels using a saw or utility knife.
  8. Apply silicone caulk to the edges and seams of the panels to create a waterproof seal.
  9. Allow the caulk to dry completely before using the bathroom.

Fun Fact: Acrylic panels were first developed in the mid-20th century and gained popularity for their use in commercial and residential applications due to their lightweight nature and resistance to impact and UV rays. Today, they are commonly used in bathrooms as a stylish and practical alternative to traditional plaster.

4. Fiberglass Panels

Fiberglass panels have become a popular choice for bathrooms, as they offer durability, moisture resistance, and easy installation. These panels are constructed with layers of fiberglass reinforced with resin, creating a strong and waterproof surface. They are lightweight, making them convenient to transport and install. Additionally, fiberglass panels offer a variety of design options, including textured and smooth finishes. However, it is important to note that some may prefer the traditional look and feel of plaster walls in their bathrooms over the aesthetic of fiberglass panels.

The development of fiberglass can be traced back to the late 1930s when Russell Games Slayter and a team at Owens-Illinois Glass Company first created it. Originally used for insulation, fiberglass eventually made its way into various industries, including construction. The introduction of fiberglass panels revolutionized the design and construction of bathrooms, providing a durable and water-resistant alternative to traditional plaster walls. Today, fiberglass panels remain a popular choice for bathroom renovations and new constructions.

Related Posts

Is Resin Flooring Suitable For Bathrooms

Hello there, are you tired of constantly worrying about the state of your bathroom floor? Well, worry no more because […]
Plumber putting a teflon joint on a thread

How to Use Plumbing Tape In Multiple Ways

Called by other names such as Teflon tape, polytetrafluoroethylene (PTFE), and plumber's tape - the plumbing tape is considered a […]
smol2

How to Replace Flexible Hose Under A Sink

After a recent bathroom renovation everything was perfect, the tiles were cleaned, rubbish and debris cleared, leaving me with a […]

Get in Touch

61a, Walton St, Walton On The Hill, Tadworth,
Surrey, KT20 7RZ

Social connect

Facebook

Pinterest

© 2024 Amory Brown.